
What It Does
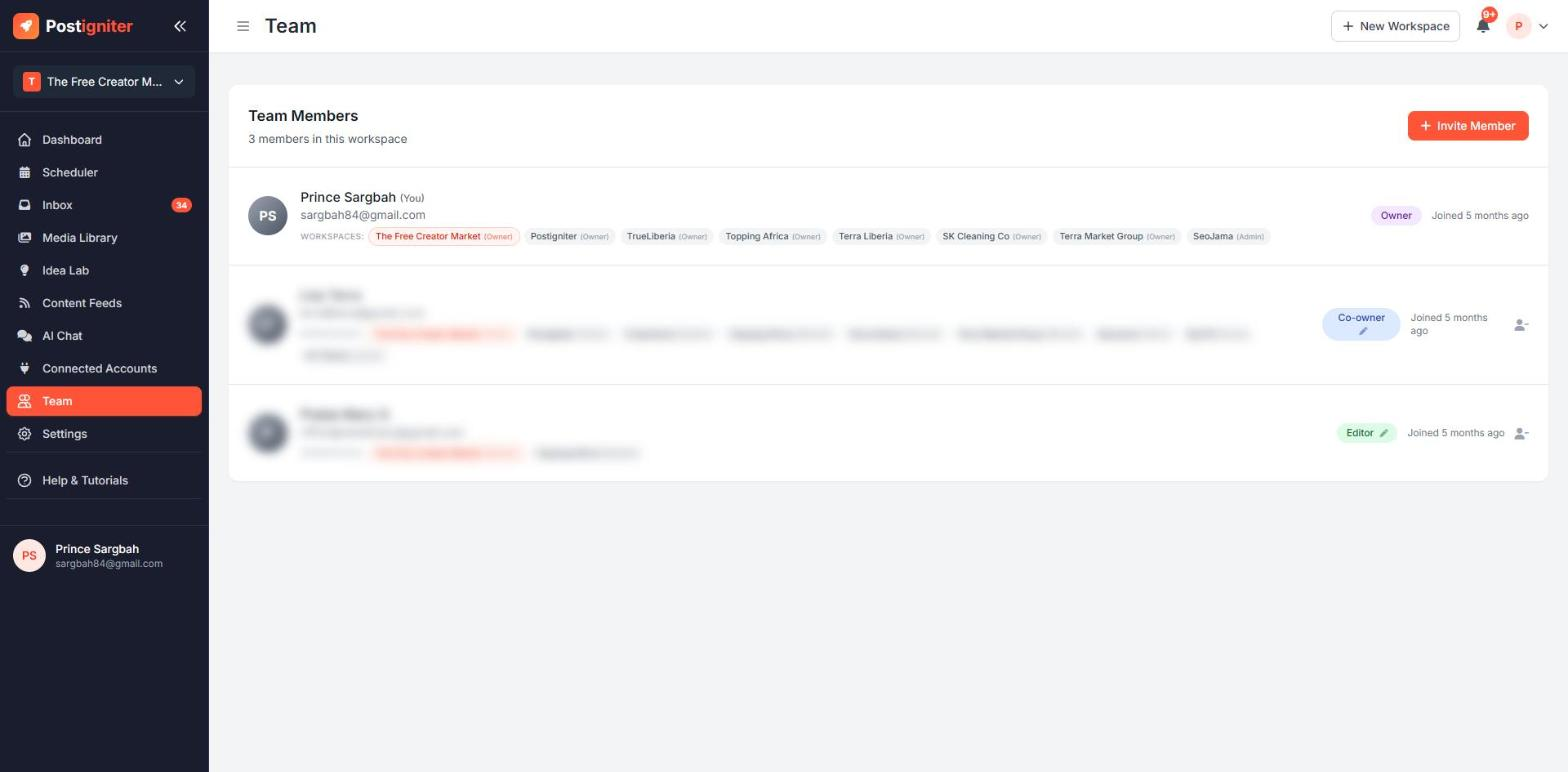
The Team page lets you invite other people to work in your workspaces, such as a social media manager, a designer or a client. Each person gets their own login and a role that controls what they can do, so you never have to share your password.
Open it from Team in the sidebar.
Roles
- Owner: everything, including billing and workspace settings. This is the person who created the workspace.
- Co-owner: full access to the workspace, including inviting and managing team members.
- Editor: can create, edit and schedule content.
- Viewer: read-only access to the workspace and its analytics.
Inviting a Team Member
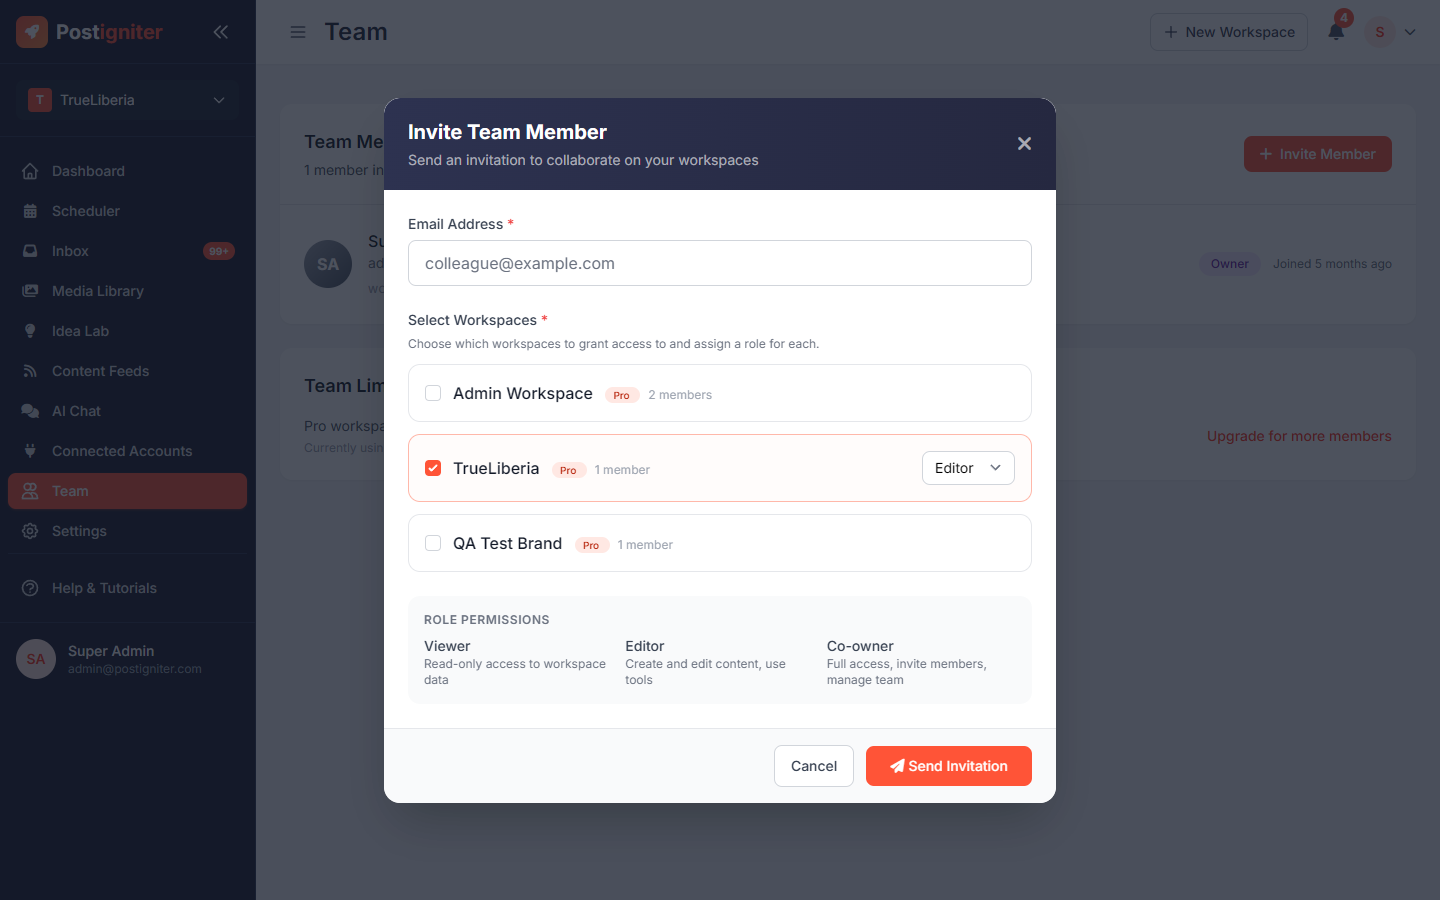
- Click Invite Member.
- Enter their email address.
- Under Select Workspaces, tick each workspace they should join and choose a role for each one. One invitation can cover several workspaces, with a different role in each.
- Click Send Invitation.
They'll receive an email with a link to accept. Until they do, the invitation appears under Pending Invitations, where you can resend or cancel it.
Only the owner and Co-owners can invite people.
Managing Your Team
- Change a role from the dropdown next to a member's name.
- Remove a member to revoke their access immediately.
- Each member's card shows which of your workspaces they belong to.
Team Limits
- Free: just you
- Pro: up to 5 team members per workspace
- Studio / Lifetime: unlimited team members
The Team Limits card shows how many seats you're using. Click Upgrade for more members if you need more.
Tips for Best Results
- Give the least access that works. Clients usually only need Viewer, which lets them see analytics and reports without changing anything.
- Use Editor for content creators so they can draft and schedule but can't manage the team.
- Remove people when a project ends. This doesn't delete anything they created.